The iMentor Platform has a page for managing Meetings and Events that occur with pairs. There are three types of meetings that can be created (click on a meeting to be taken to that section):
1) Event - A formal, structured event for big groups (Curriculum, non-curriculum, graduation).
2) Pair Meeting - A formal meeting for individualized pair support, checking in with pairs (Categories include Academic support, Family engagement, Lunch, Virtual, and Other)
3) Pair Expedition - An unsupervised meeting between mentee/mentor (college visit, lunch, movie, etc)
The Platform makes it easy to create these events and track participation at them. Keep reading to find out how!
Viewing Meetings and Events
This is what the page will look like when you first go to Meetings and Events, which can be found in the Hamburger Menu: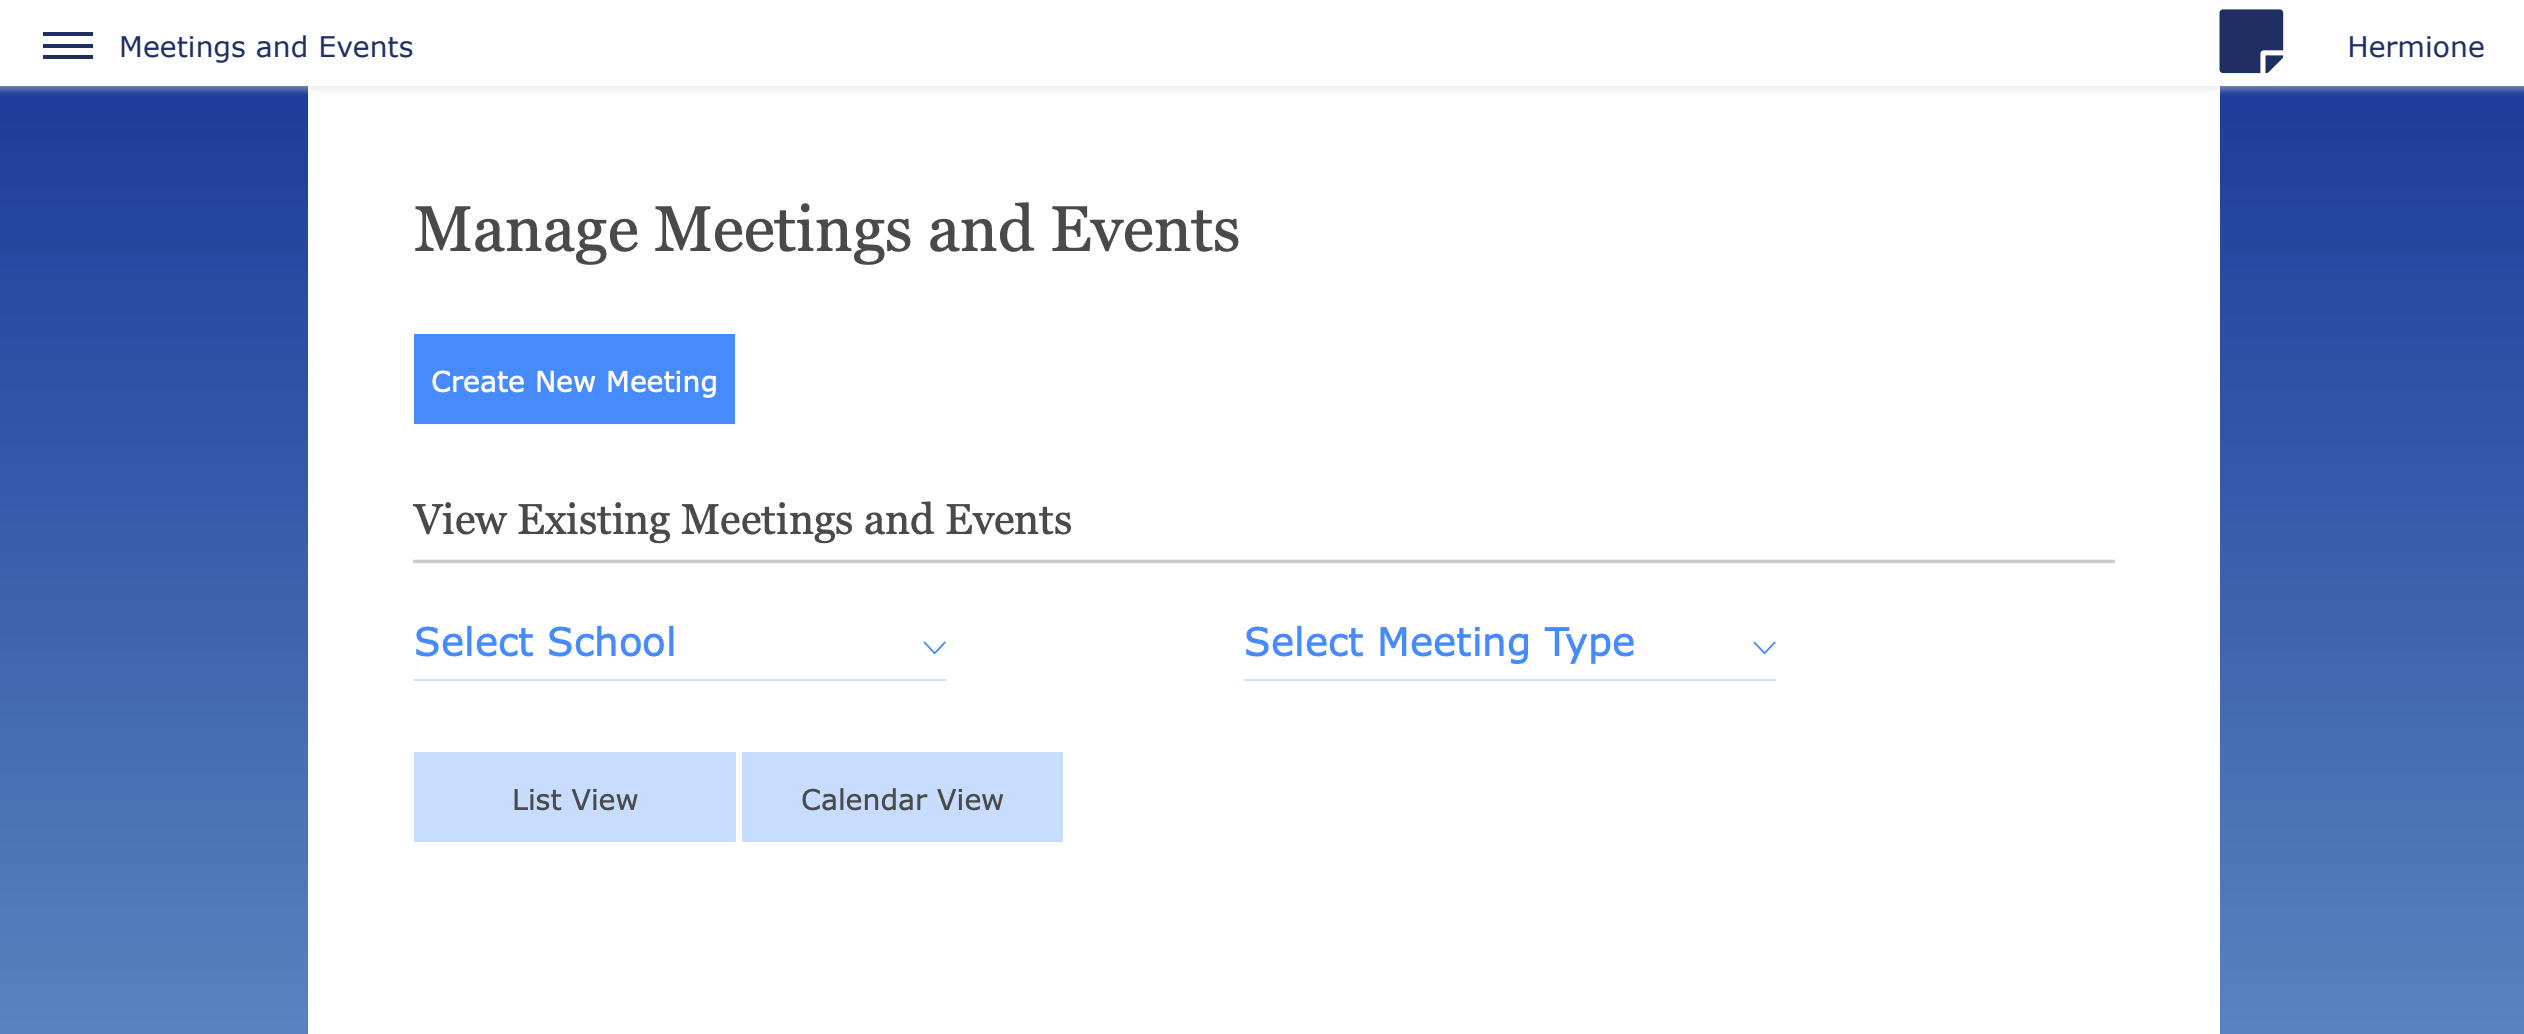
There are two options here:
1) Create a new Meeting
2) View Existing meetings by selecting the school and/or the meeting type (NOTE: multiple schools and meeting types can be selected at once)
From there, the events can be shown in either a list view or a calendar view:

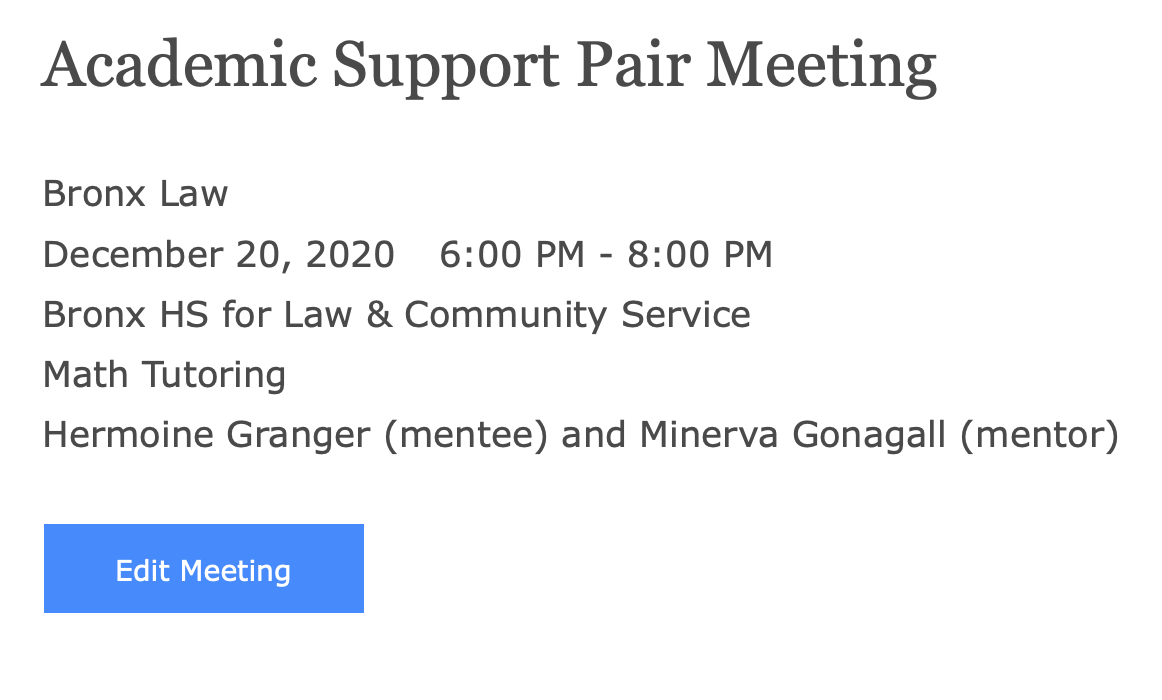
On the list view, you can see the event type, category of the event, school, date the event takes place on, and start/end time. Clicking on "View Details" will bring you to the event summary page for that event.
On the Calendar view, you can select the month by clicking on the month/year title. Click on an event to view more details about it.
When clicking on an event, the event details will appear. From there, you can go in further to edit the meeting:
Creating a Curricular Event
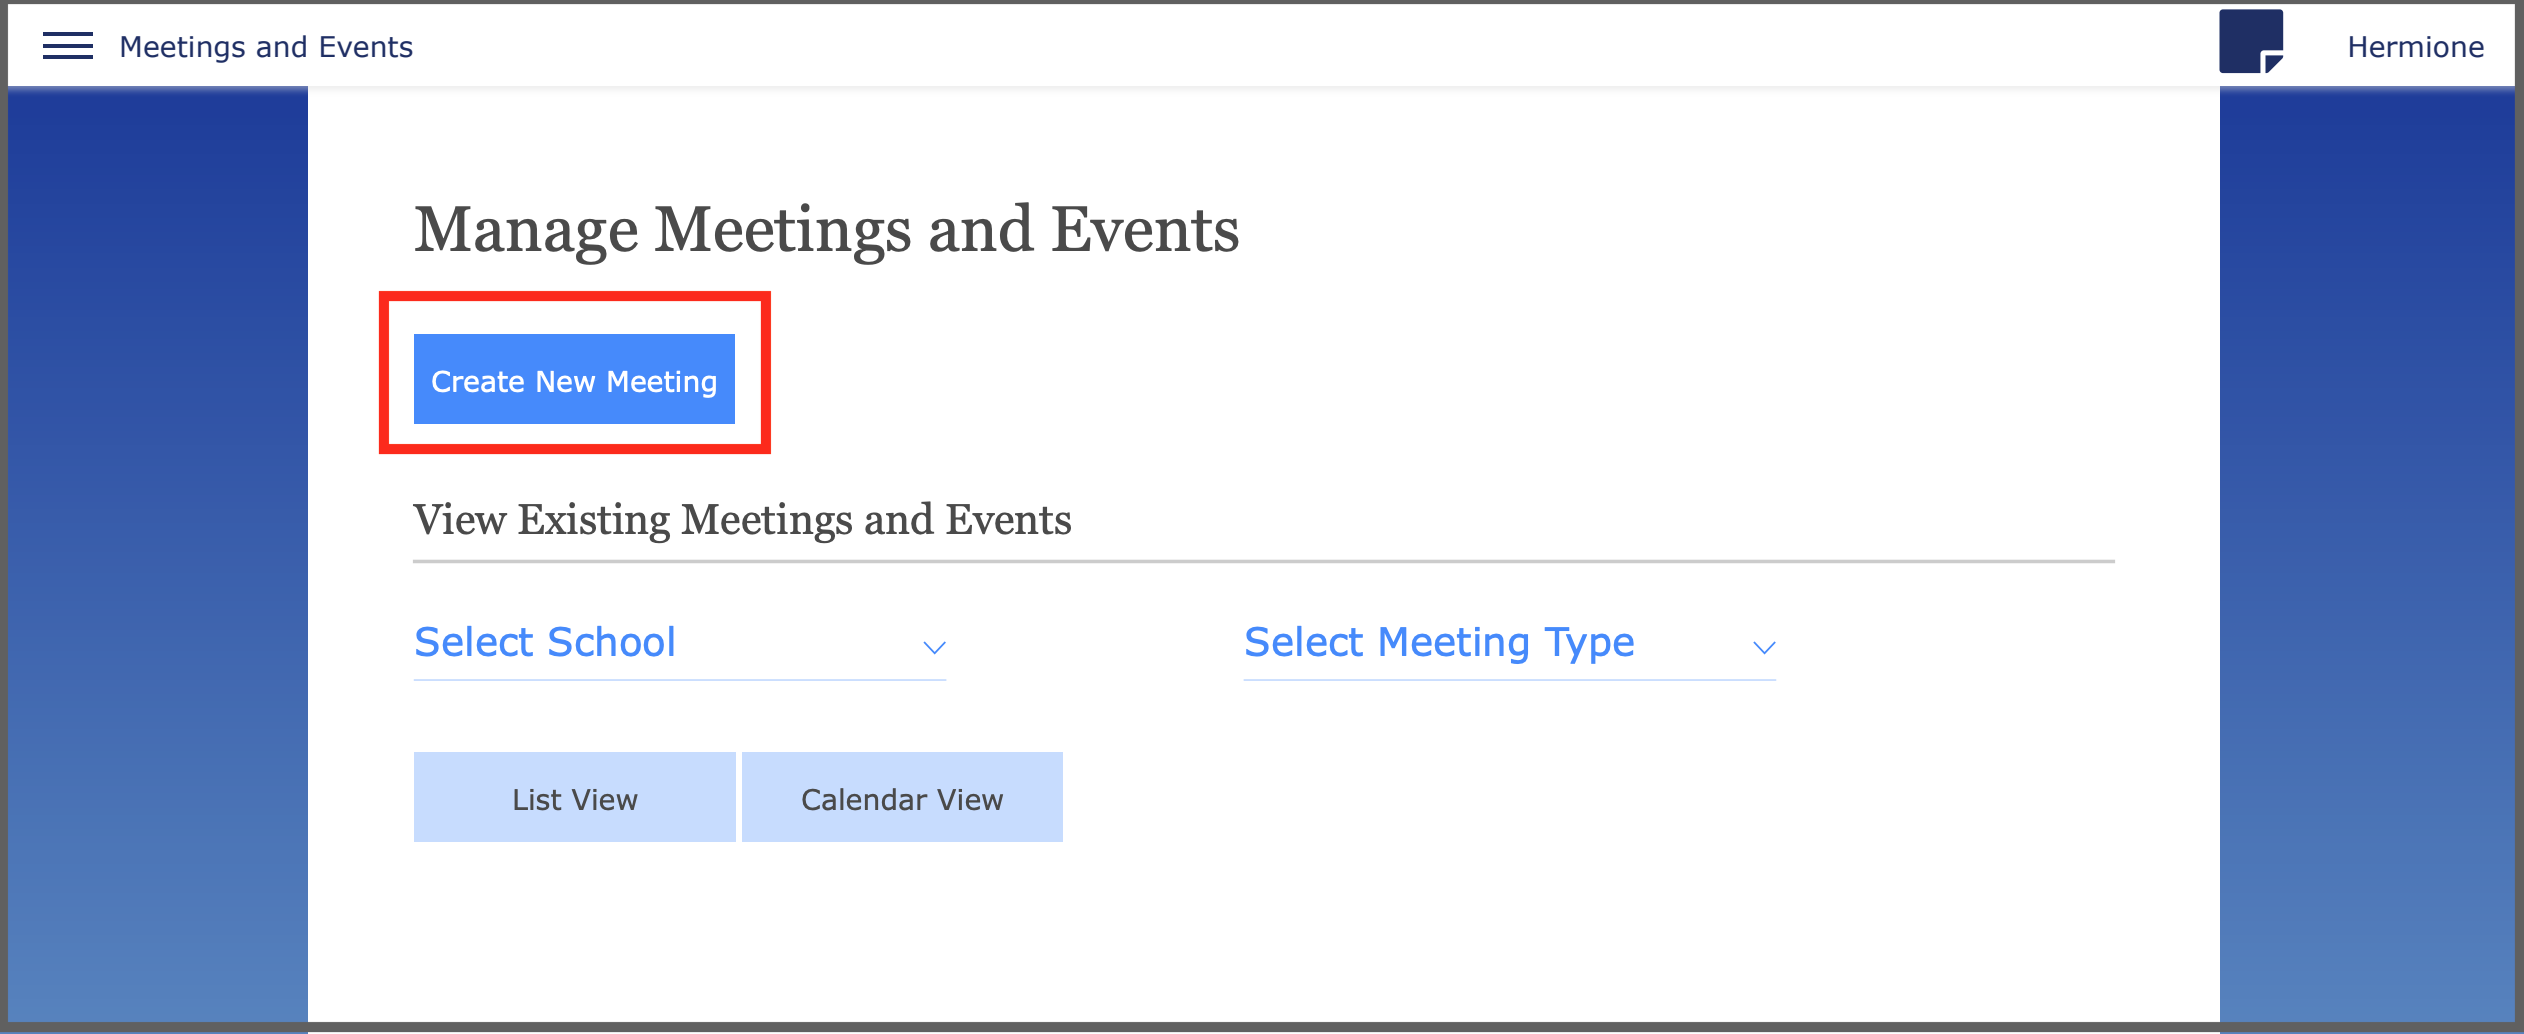
The first type of meeting to create will be an event. To start, click on "Create new meeting":
Next, select the school and then the event type, then the category. It can either be Curricular, Non Curricular, or Graduation:

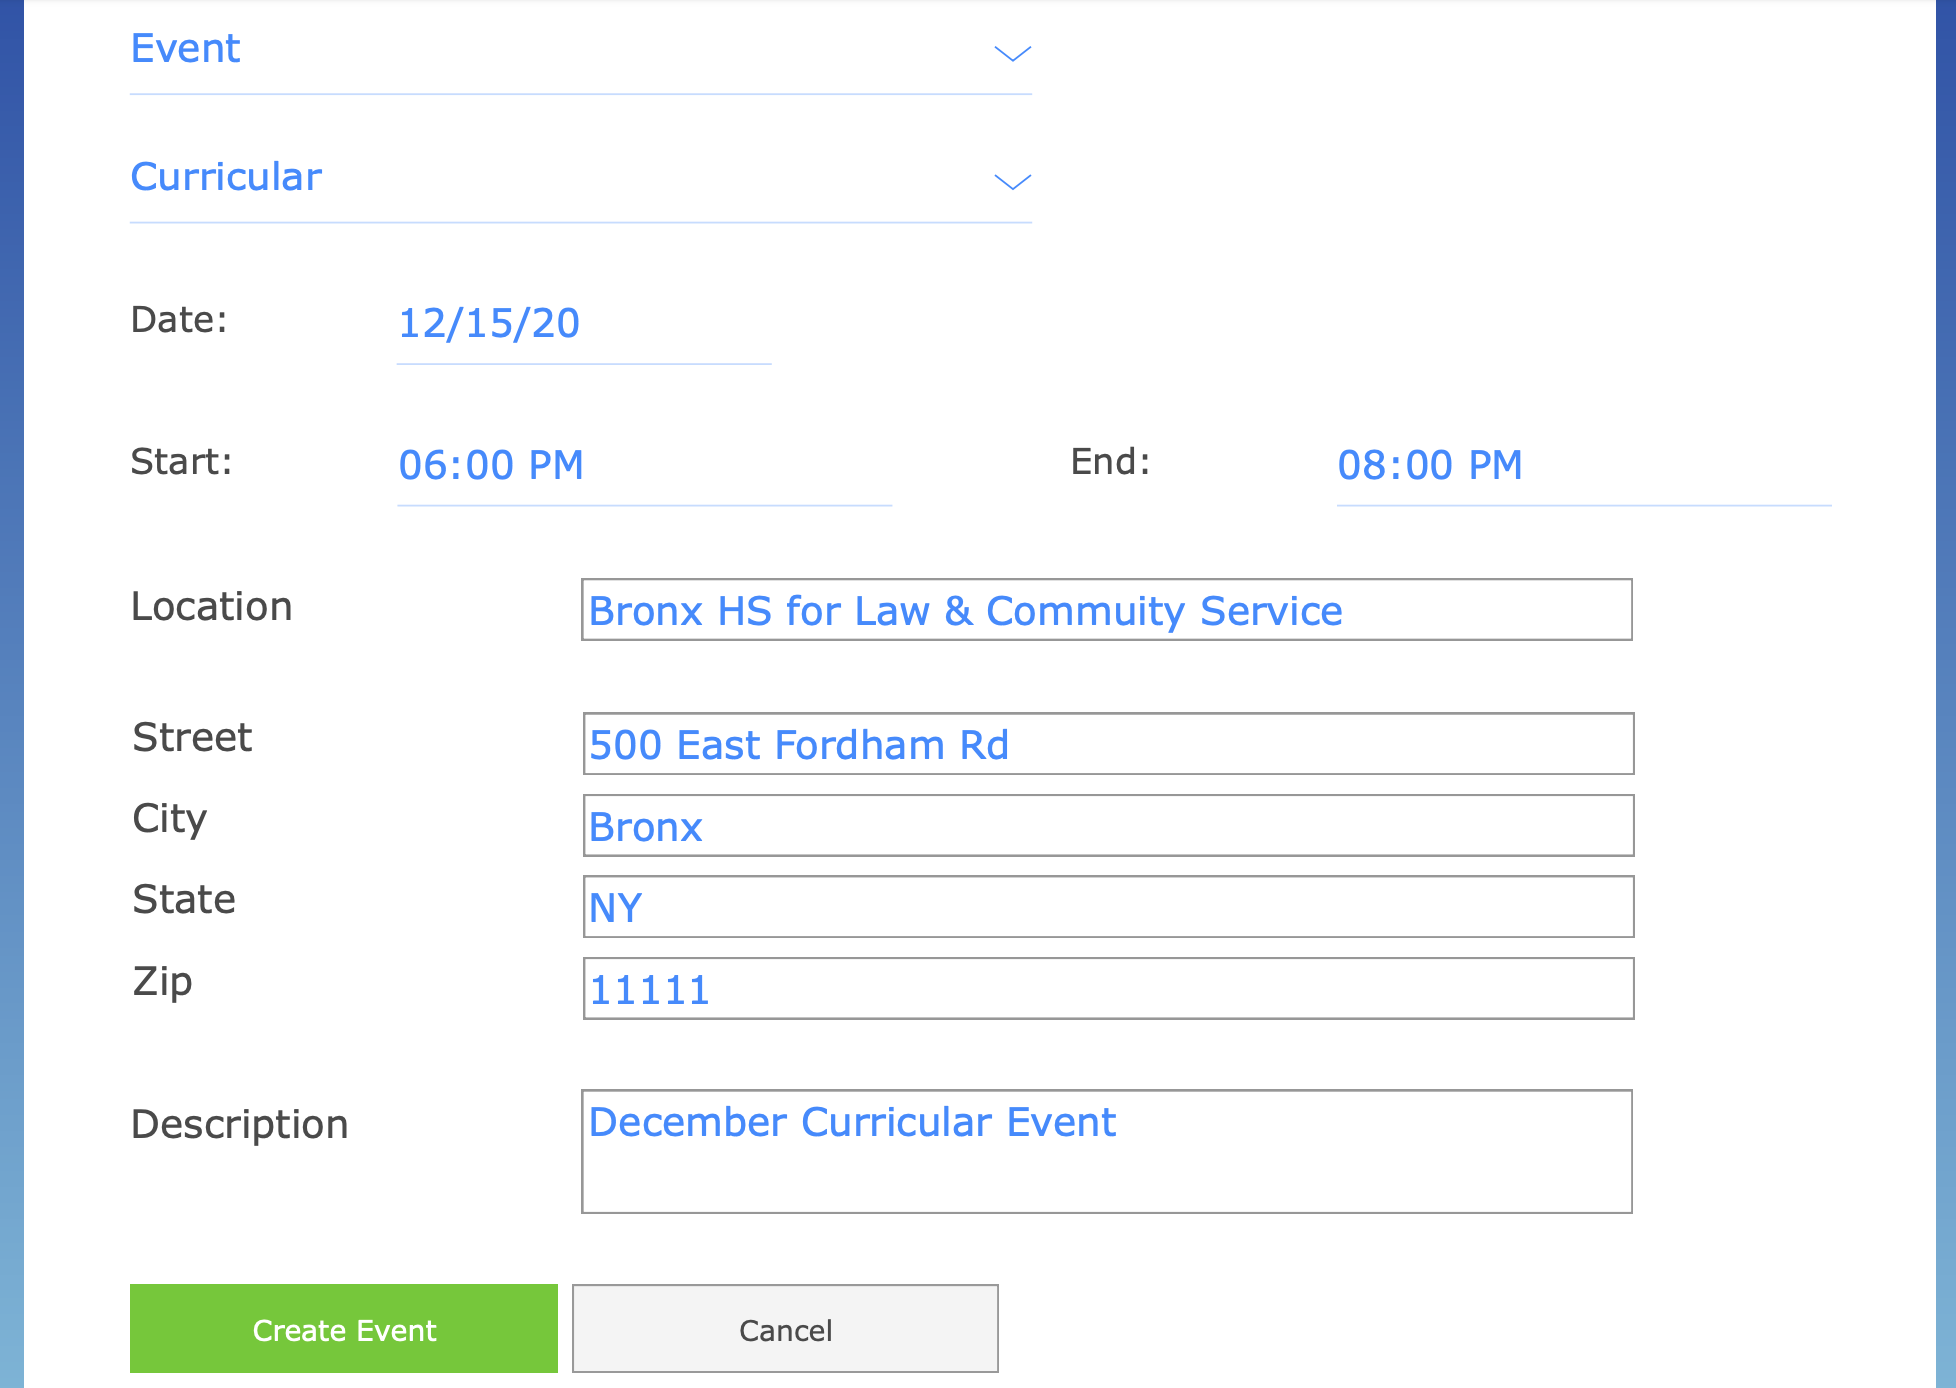
Next up is the fun part - filling in all the details about the event! You'll enter the date, the start/end times, the location, address, and finally a description of the event. This is all information mentors and mentees will see when they go to RSVP to the event, so double check to make sure everything is correct:
For the curious: This is what it will look like for mentors/mentees when they log on to the Platform:

But wait! No one is going to get those pop-ups if they haven't been invited to the event yet. So far we've only created the event but haven't invited anyone to it. We don't want to be the only ones there, so on the event creation confirmation page, let's click on "Invite":

After clicking "Invite" we'll be taken to a page with a list of Active, Matched users within our school. From that list we can select who to invite by clicking the box to the left of their names and then clicking "Invite."
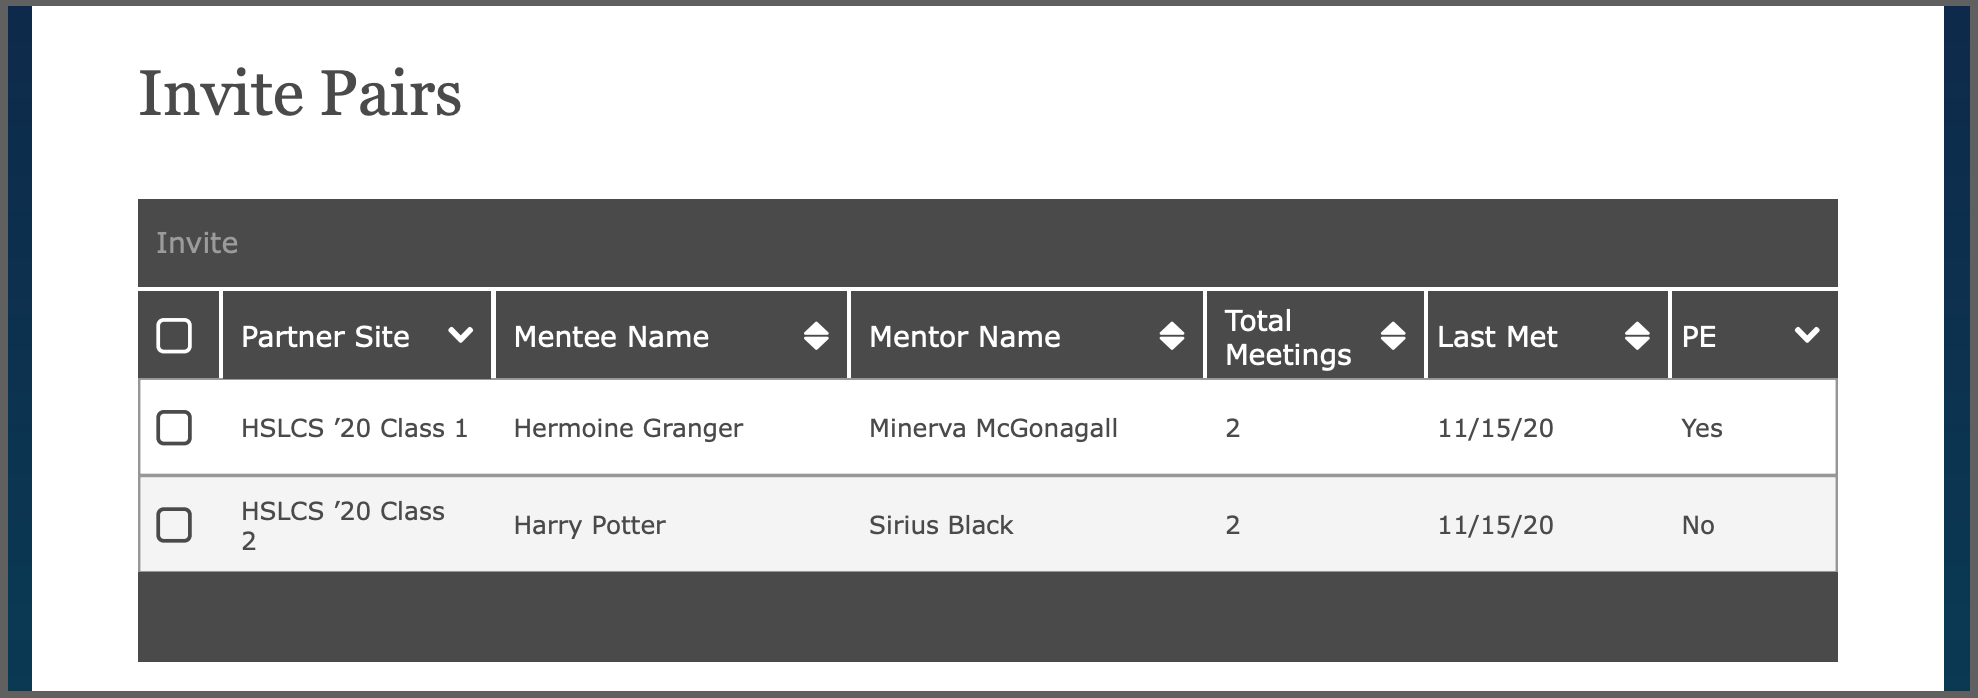
On this page you can filter by Parter Site, Pair Expedition, or sort by name, total meetings, and when the pair last met.
Before the event
Once the pairs are invited, the event summary will update to show how many mentees/mentors are invited and how many have RSVP'd:
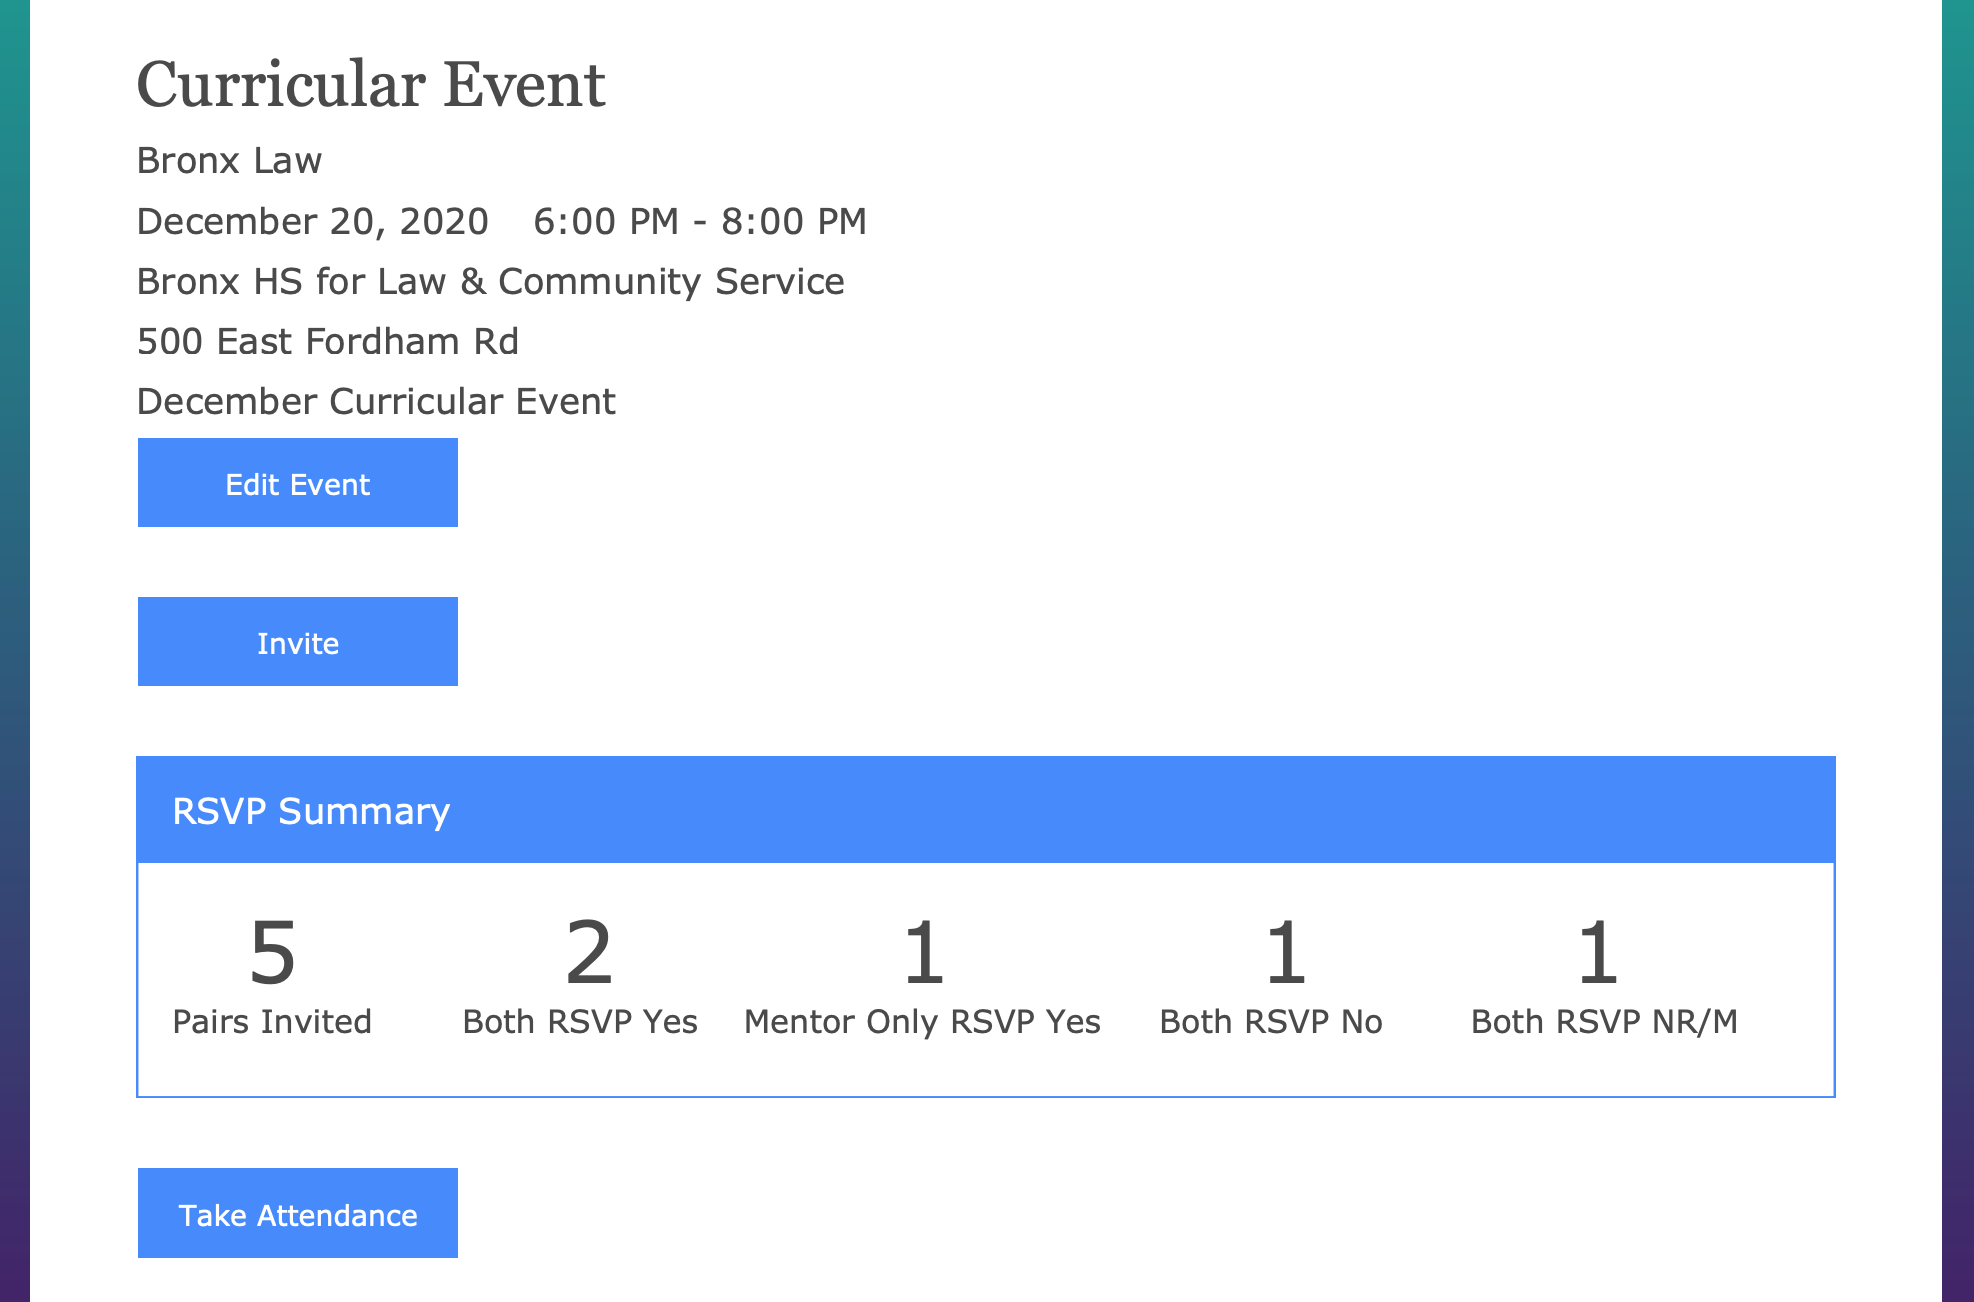
Below that will be a table with all of the pairs who have been invited. The RSVP statuses will update automatically as they interact with the event invite pop-ups they get. As an admin for the event, you also have the option to change their RSVP status for them: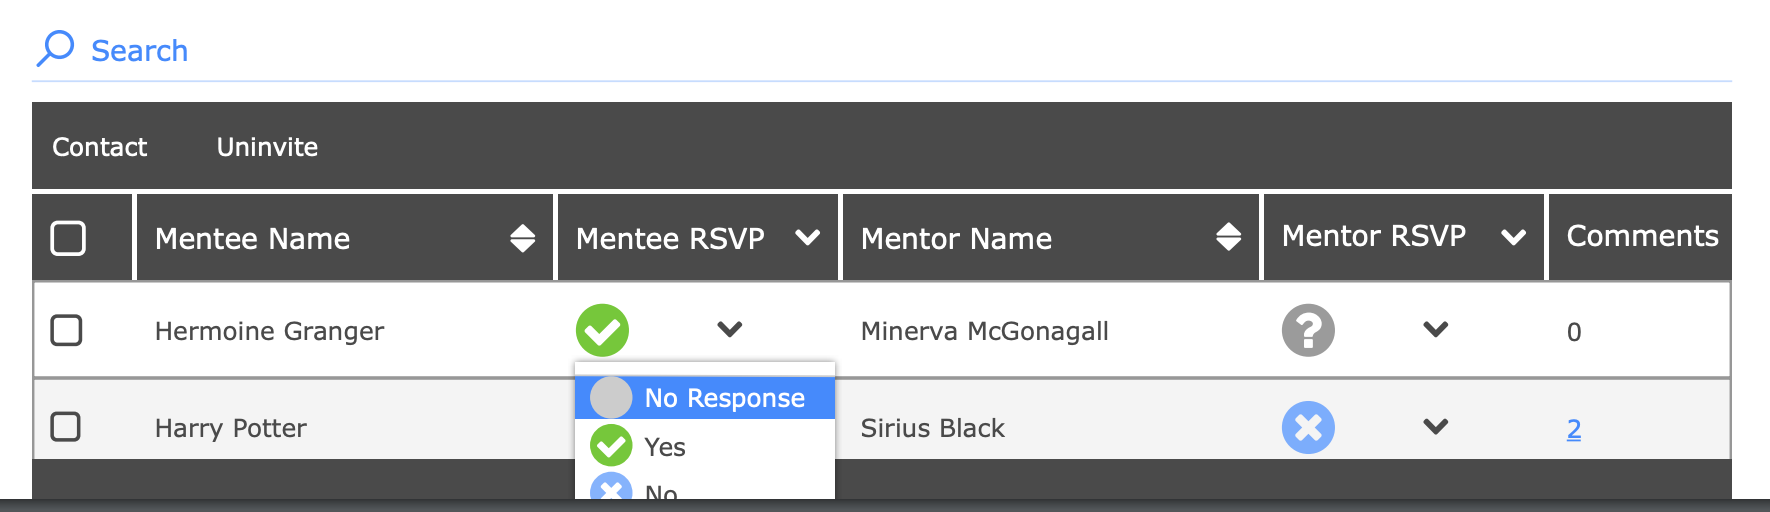
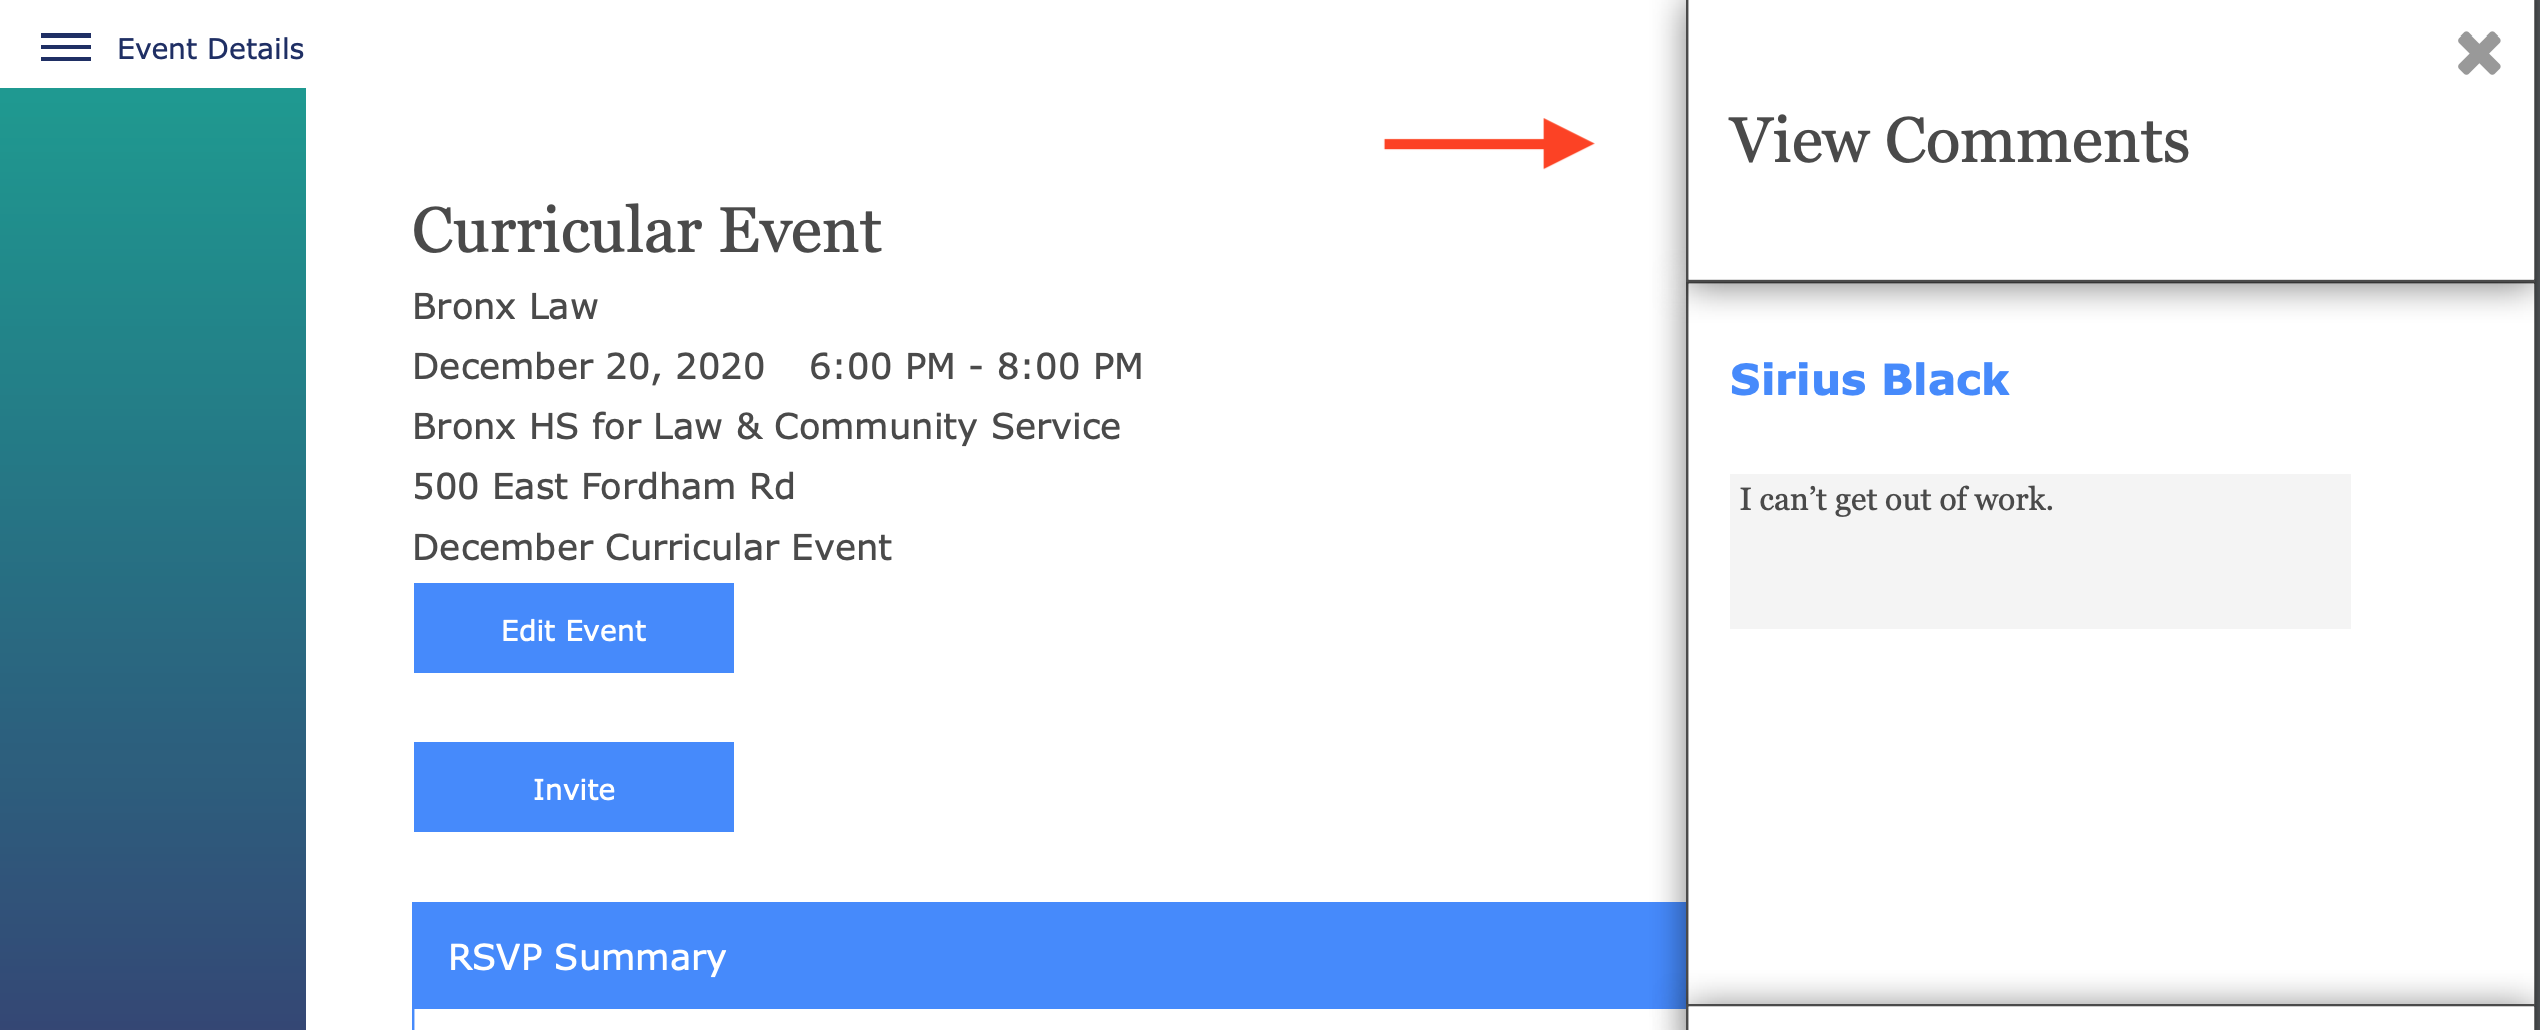
If a mentor/mentee responds "No" they're required to leave a comment explaining why they can't attend. You can read those comments by clicking on the number on the right side of the table under the "comments" column, which pulls up the side-bar:
To send a reminder about the event to pairs, select the pairs you'd like to contact, then click the "Contact" button. From there you can either email the mentor, mentee, or both, or text the mentor, mentee, or both. Selecting email will pull up your native email client where you can type in a message manually. Selecting text will send an automated text with a link to the event. The text will read:
Please remember to RSVP to this Event!
To view this event click HERE OR log in to your Region/Partner Site event calendar at: URL

After the event
Attendance can be taken directly on the Platform. To do this, simply click on the blue "Take Attendance" button found under the RSVP summary. Once there, you can mark the attendance for both mentees and mentors by clicking the gray circle: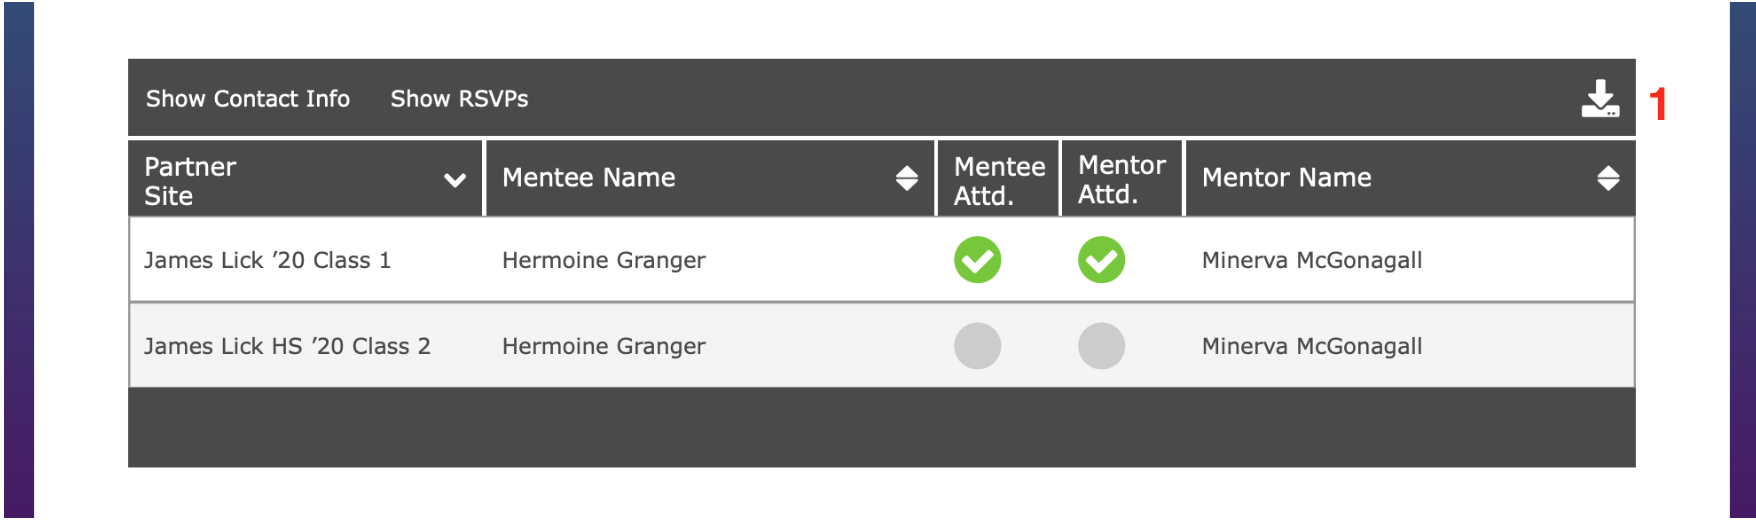
1) On the top right of the box, you can click the arrow button to download the RSVP list to an Excel sheet which can then be printed out. This list will include names, contact info, RSVP, attendance, etc.
Deleting an Event
Users can delete events by going into the event details and clicking "Edit event." From there, they can scroll down to delete it:
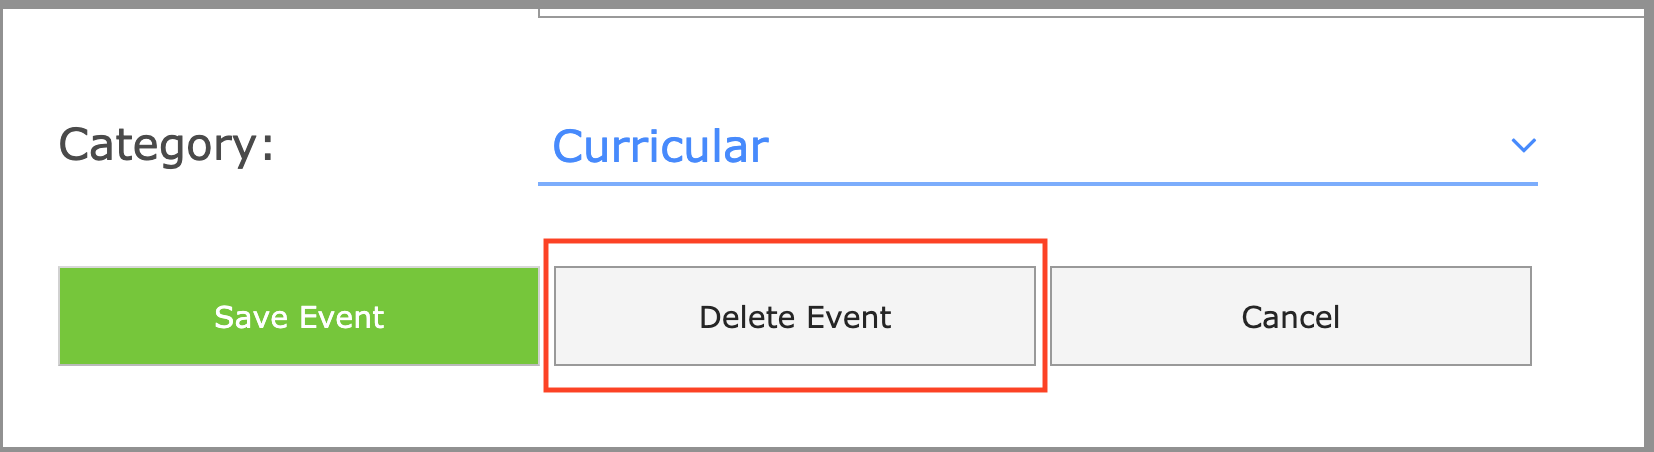
A popup will appear, where you can select either "Yes, Delete" or "Cancel."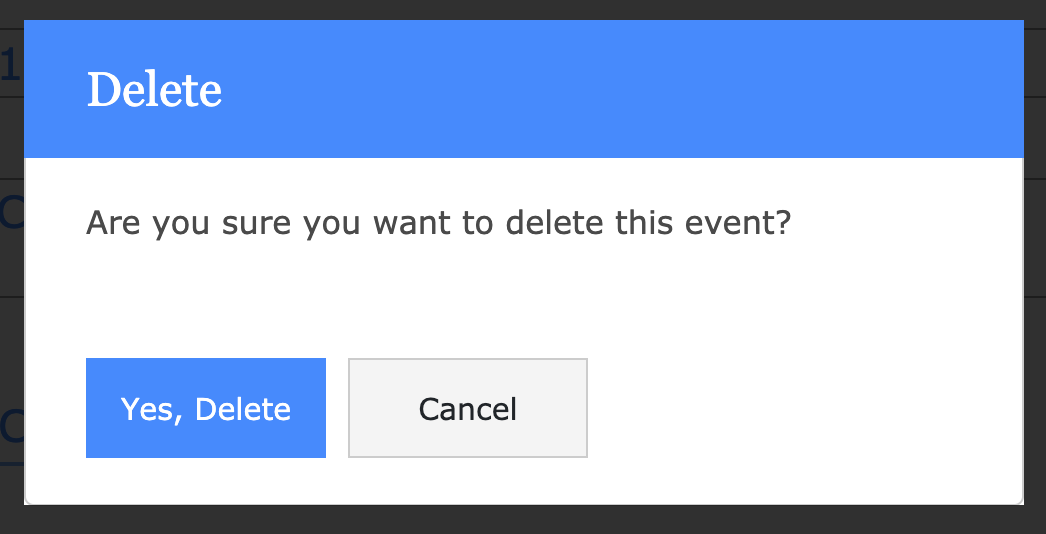
Afterwards, the event will be permanently deleted. You will not be able to access it anymore. Additionally, there's no messaging that gets sent out to pairs when an event is deleted, so it would be a good idea to send everyone an email beforehand letting them know the event is being cancelled.
Pair Meetings
Pair Meetings are formal meetings for individualized pair support and checking in with pairs. Categories include: Academic support, Family engagement, Lunch, Virtual, and Other. When creating an event, select "Pair Meeting" and then select the category: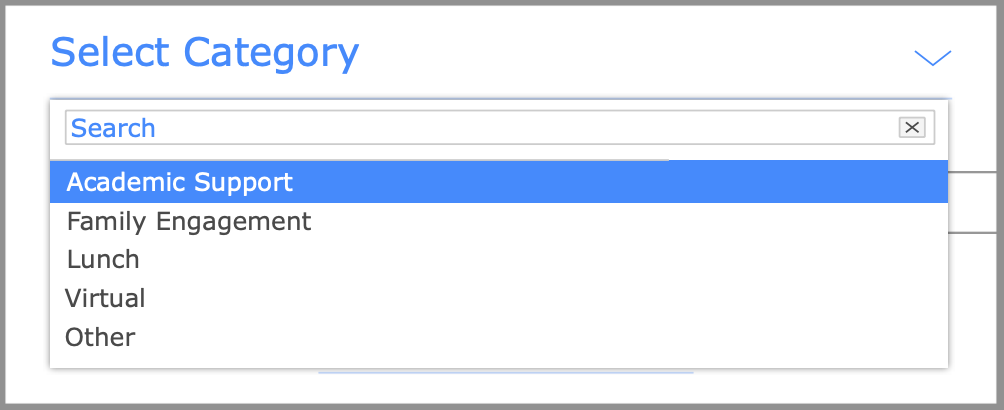
Once the category is selected, you can fill out all the details of the meeting, just like an event: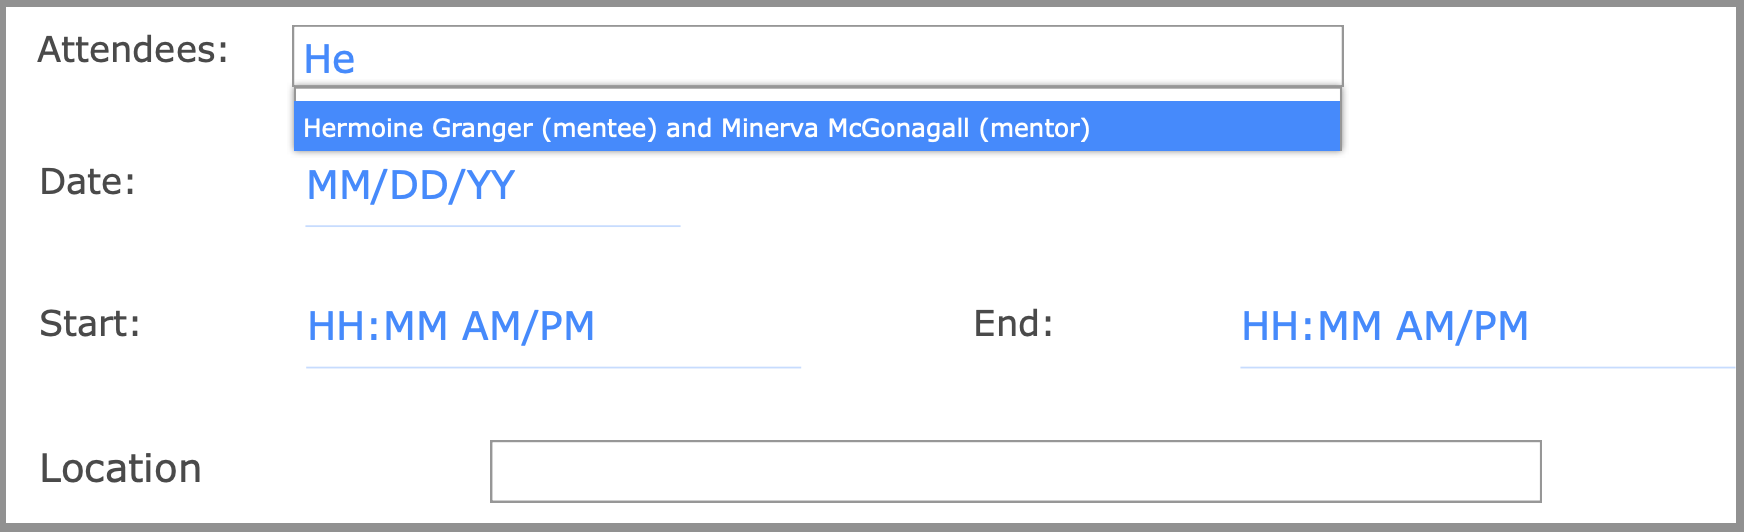
Pair Expeditions
NOTE: Only iMentor direct service regions (NYC, Chicago, Bay Area, and Baltimore) use this feature.
Pair expeditions (PE's) are unsupervised meetups between the mentor and mentee. To be eligible for a PE, both parties must have already turned in their consent form.
The different categories of PE's are:
College Visit
Post-secondary Support
Recreational Activity
Workplace visit
Other
Mentors can request a PE from their own Platform (to view how, click here) - or staff can create the event for them. If they request a PE, the assigned member admin will receive the following pop-up upon logging into the Platform:
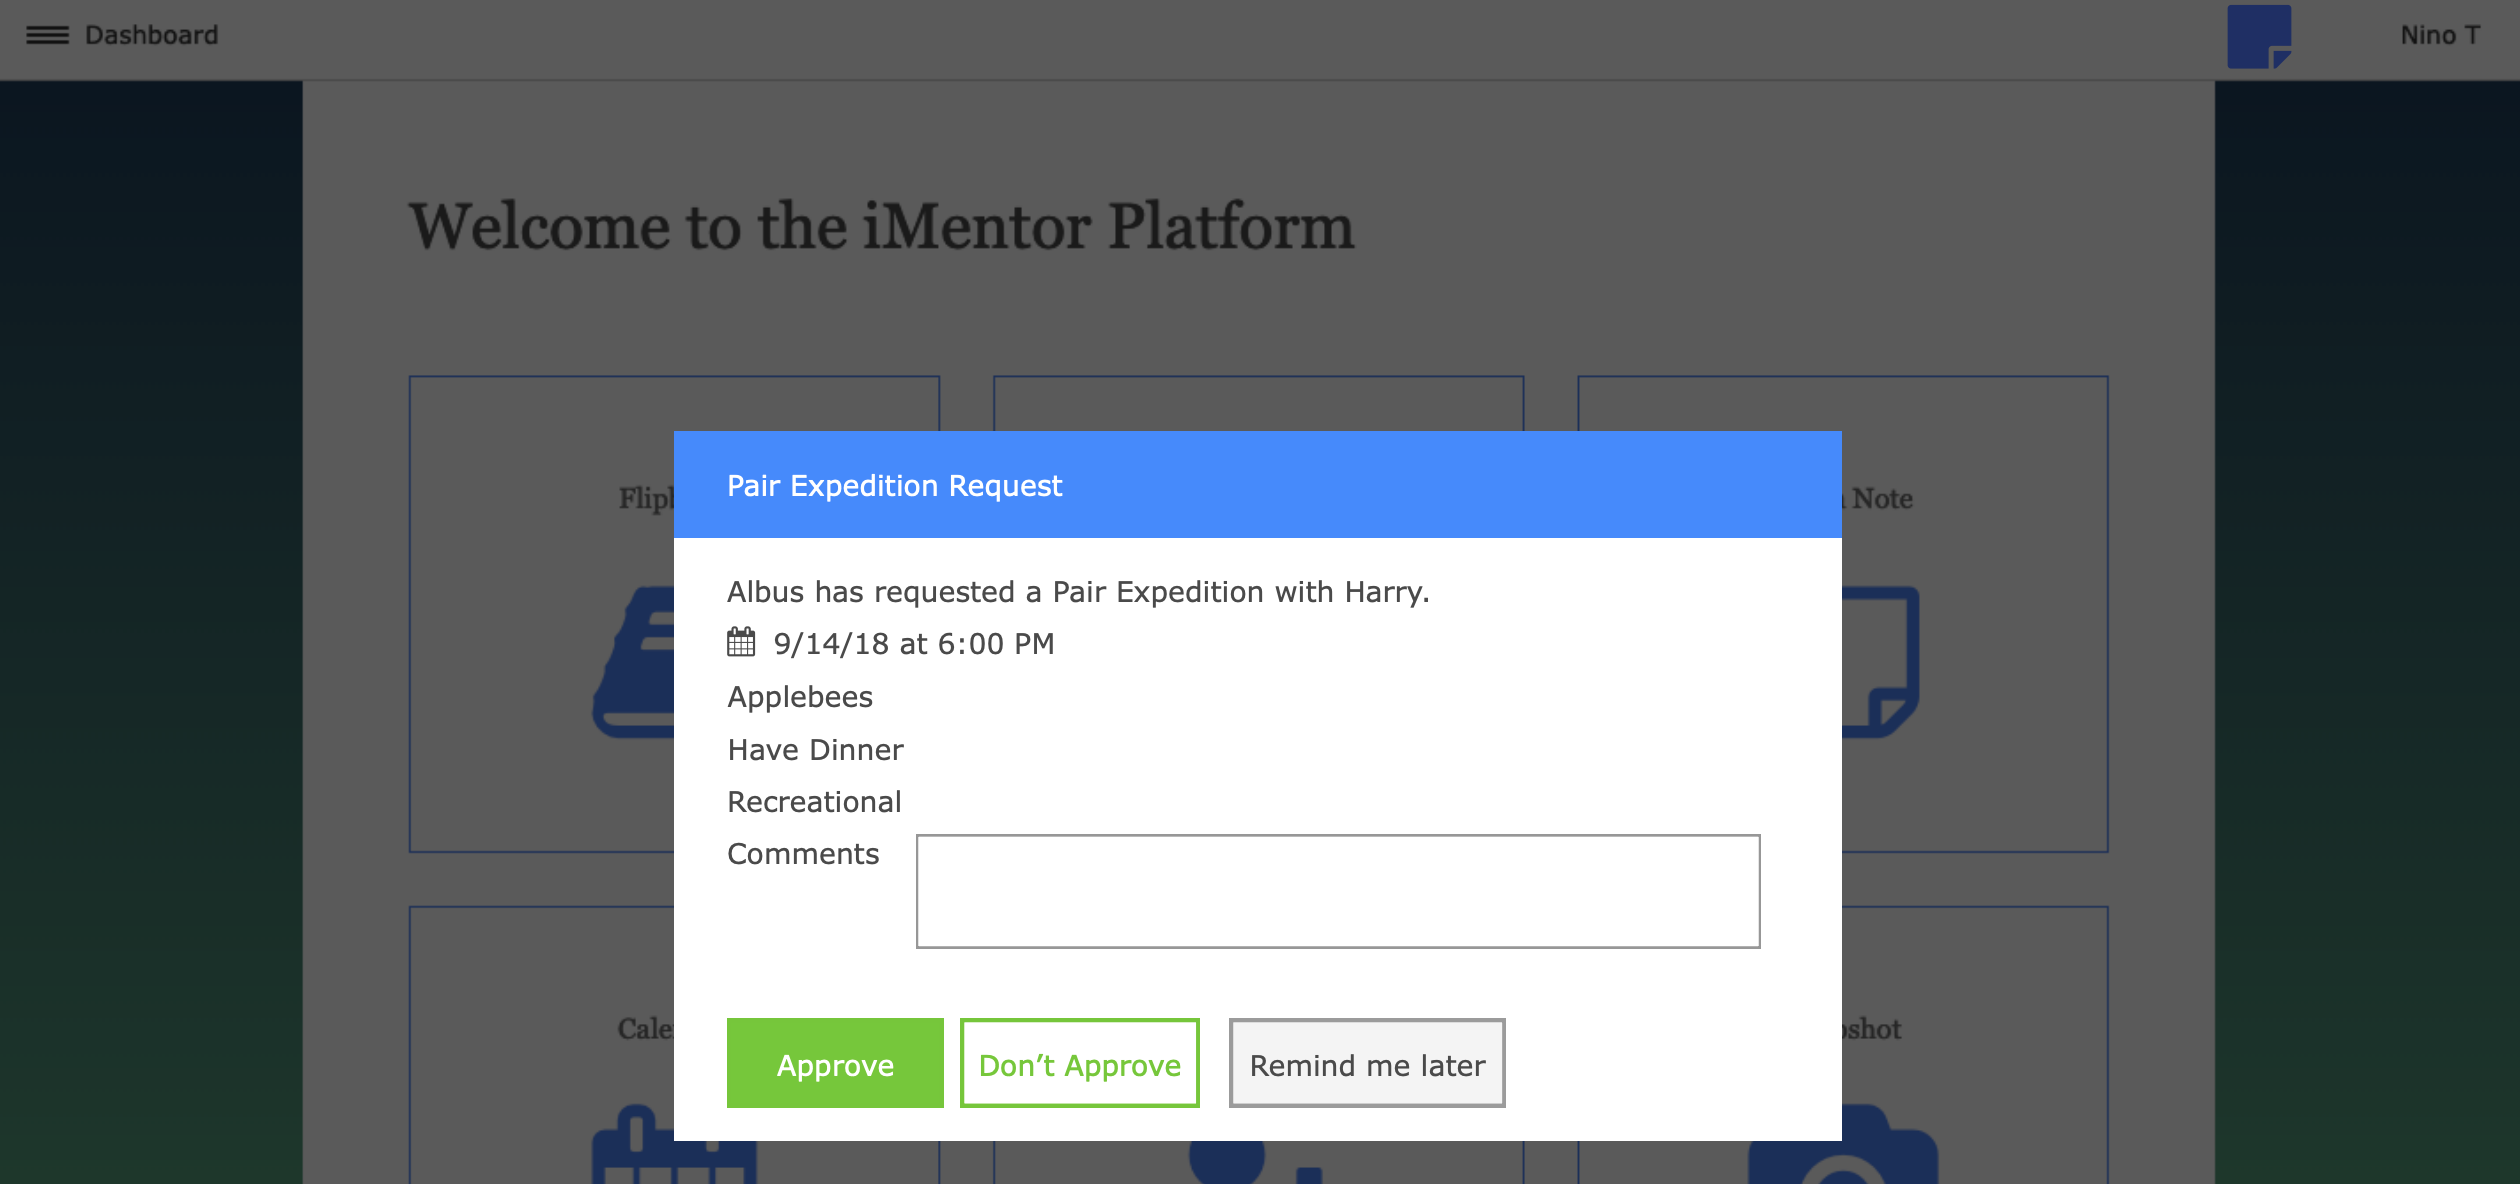
From here, staff can either Approve, not approve, or choose to have the pop-up appear the next time they log in. If "Don't Approve" is selected, a comment will have to be left explaining why. The pair then has the option to edit their request.
To create a new PE for a pair, choose "Pair Expedition" when creating a new meeting. Then fill out the following information:
At the end, you can choose if the outing is approved or not, then press submit. The pair will get a notification that a PE has been approved for them.
After the PE, you can go into the meeting details and mark if the pair met or not:

Questions?
Please write in to [email protected] with any questions about this page or anything else on the Platform!