Each user on the iMentor Platform has a user profile that contains information and data about that user. The user profile is the main place where administrators will go to view information about a user and edit the information if necessary. On the user profile, you can look up the contact information of a user, make edits to a user's information, read the notes on that particular user, view their match, and access their intake application.
We'll take a look at this page one section at a time, in the order of the numbers on the screenshot below:
Jump to:
1: Edit
5: Notes
6: User History
7: Application
8: Texting
1: Edit Details Button
Click this pencil icon to make edits to the user's details including name, email, phone, picture, etc. When you click "View More" all the user's info will appear: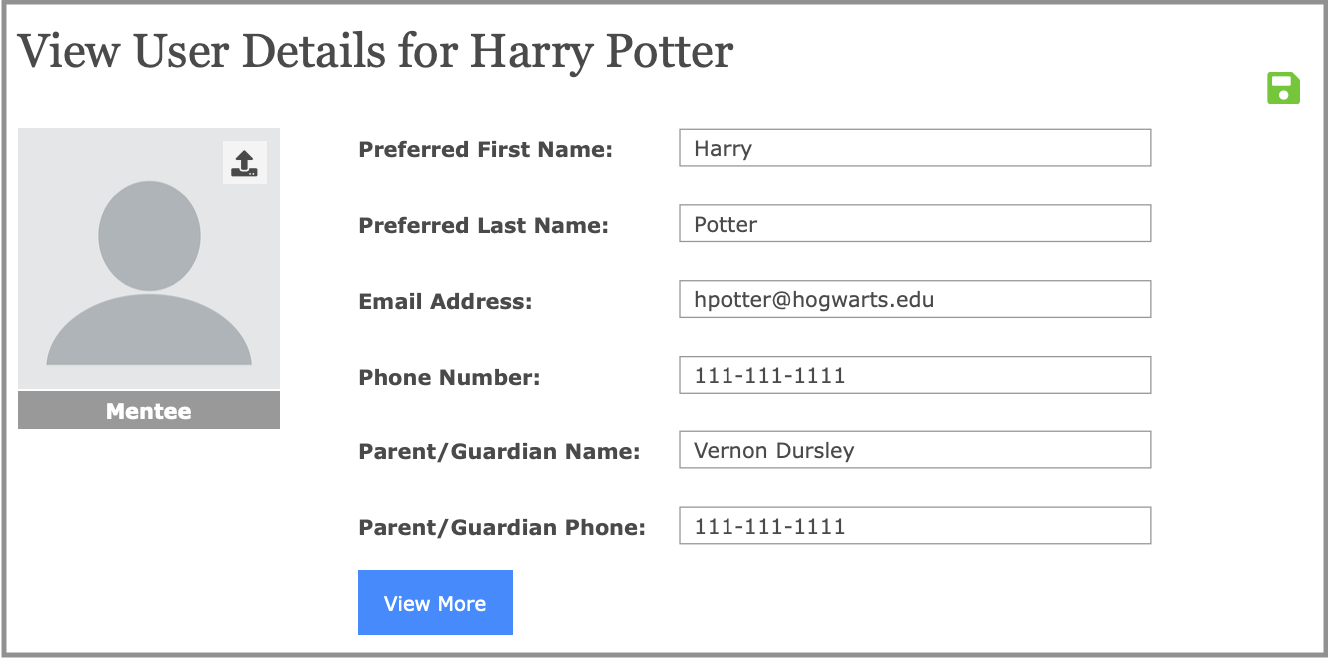
Simply type into the fields, make a yes/no selection or choose from a dropdown menu depending on the field, then click the green "save" icon at the top right when you're done and the info will be updated.
User pictures can also be updated when in edit mode - click the trashcan icon to delete the current picture, or the arrow to upload a new one.

2: Password Reset
To reset a user's password for them, click on the "Reset Password" button under their profile picture.
This will bring you to the following page, where you can reset the user's password (as long as it fits within the password criteria).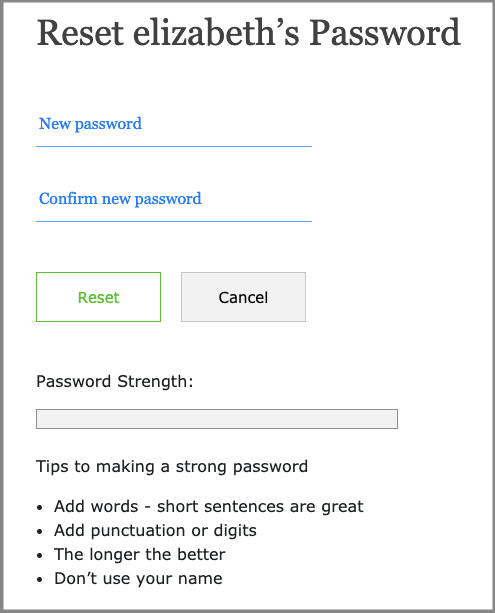
3: View More
To view even more details about a user, click on this button to reveal a longer list:
There are four sections here - Contact info, Parent info, User info, and PSP info. To edit any of this, click the blue pencil icon on the top right.
4: Match Information tab
This section will show information on the user's match, if they have one. To view the match's profile, click on their name.

Under the match name, you'll see info about the match status (closed, matched, etc), who the assigned PM is (click on their name to go to their profile), which partner site the pair is in, if the PE consent form is turned in or not, and information regarding the last time the pair sent a Conversations message, a Lesson message, and the last time they met.
Clicking on "Last Chat" or "Last Lesson" will bring you to that message so you can read it.
To close the match, click on the blue "Close Match" button under the profile picture.
To edit info like partner sites, click on the blue pencil icon on the top right of this section.
When a user is not matched, the section will look like this:
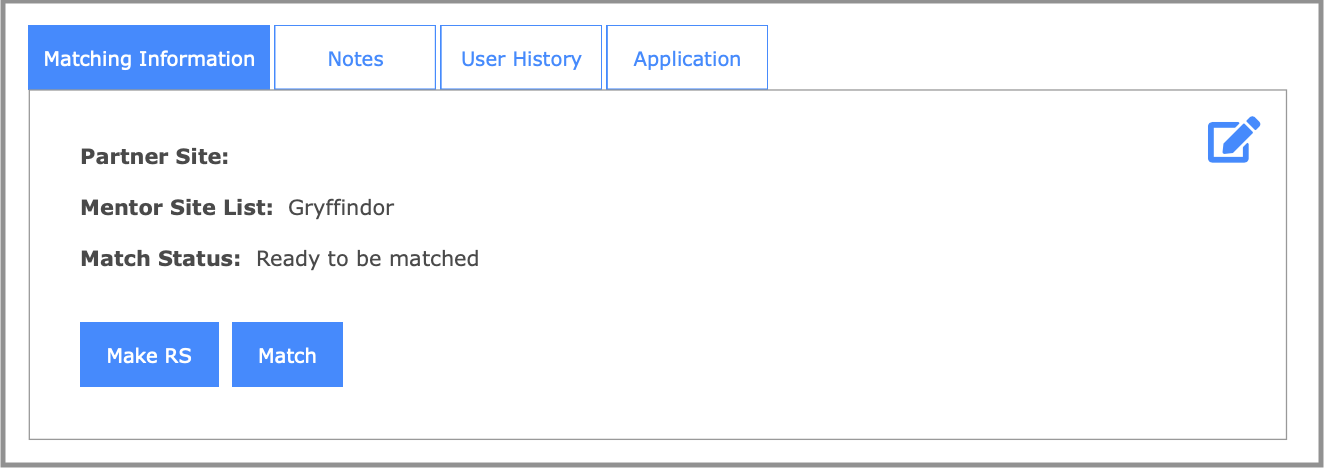
The match status will be displayed, and the buttons below will populate based on the status. In this example, the user is RTBM (ready to be matched), so we have the options to either match them, or move them to RS (Re-screening).
5: Notes
In the Notes tab, you can view all Notes that have been left for the user, as well as the match notes. The columns shown are Template, Author, Date, Assignee, Categories, and Details. You can also use the search bar to search for a specific note!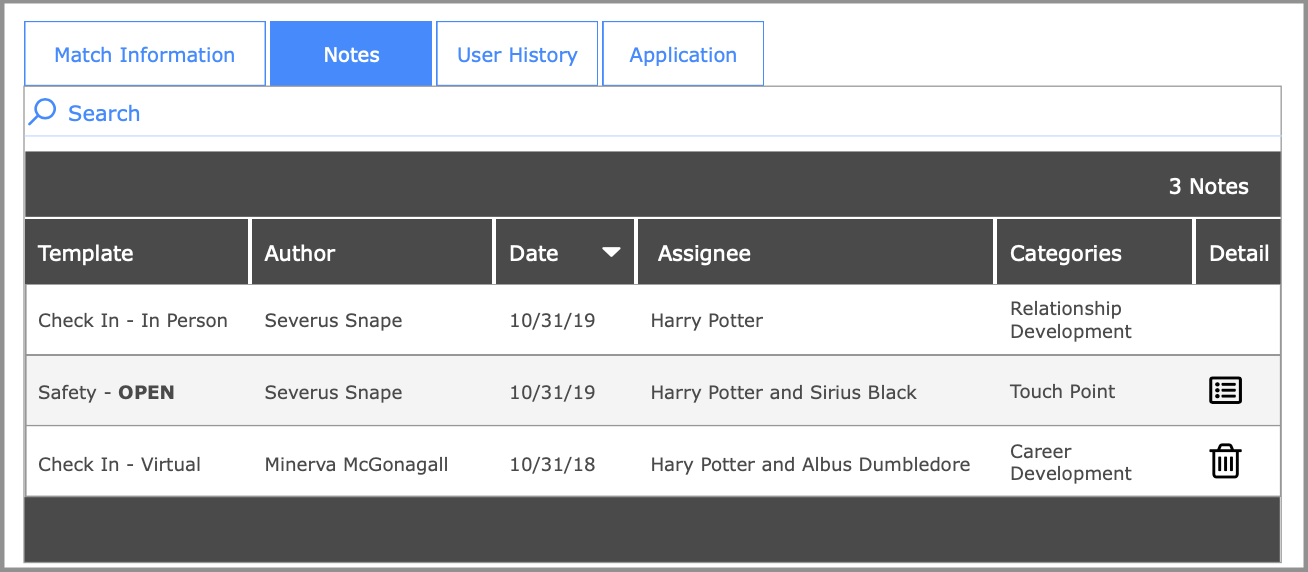
6: User History
User history shows all of the past matches the user has had.
 Here we can view any past matches, along with the start and end date and any notes that were left for the pair by clicking the "View Notes" button. Below we can view all personas for this user (when a match is closed, a new persona is created so the user can be matched with someone new).
7: Application
This is where you can view the user's application. If something needs to be changed, staff can go in and make any required updates here. Click on each section of the application (Contact Information, Evaluation, etc) to view that page.

8: Texting
All text message threads with the user will be stored int the "Text History" tab:
Click through the threads in the "recipients" column to view the threads. Scroll down in a thread to reply to the message.
And with that, you're now an expert on User Profiles!
Questions?
Check out the Thinkific training on User Profiles.
Reach out to [email protected] or the #support-platform Slack channel.